
What is an access key?
An access key outlines what will happen at an event and lets people know how to access both inside and outside the venue and how to get there.
Writing an access key is about giving people the best information about your event so they have agency and confidence to attend1.
Having an access key also shows the people in your organisation and other participants that you’re dedicated to including everyone in your events and services.1
It's important to find a venue that is accessible for everyone. However, if this is not possible, an online or hybrid event could be the next best option.
There is a range of access needs people might have, and sometimes it’s not possible to meet all of these for various reasons such as time constraints, budget or venue. For example, you might be hosting your event in a heritage listed site that you can’t make changes to.
An access key is usually created as a word document, that includes a contents page at the beginning. Every access key you read or create will be slightly different, as they need to be tailored to the specific venue.
You could create an access key for your workplace, youth space or another venue you use frequently. You can also create an access key for specific, one-off events, such as a dance event, movie night and more!
When creating an access key for the first time, please refer to Undercurrent Victoria’s framework, which breaks down getting to the event, entering the venue, inside the venue, bathrooms and breakout areas into detailed checklists to include in your access key.
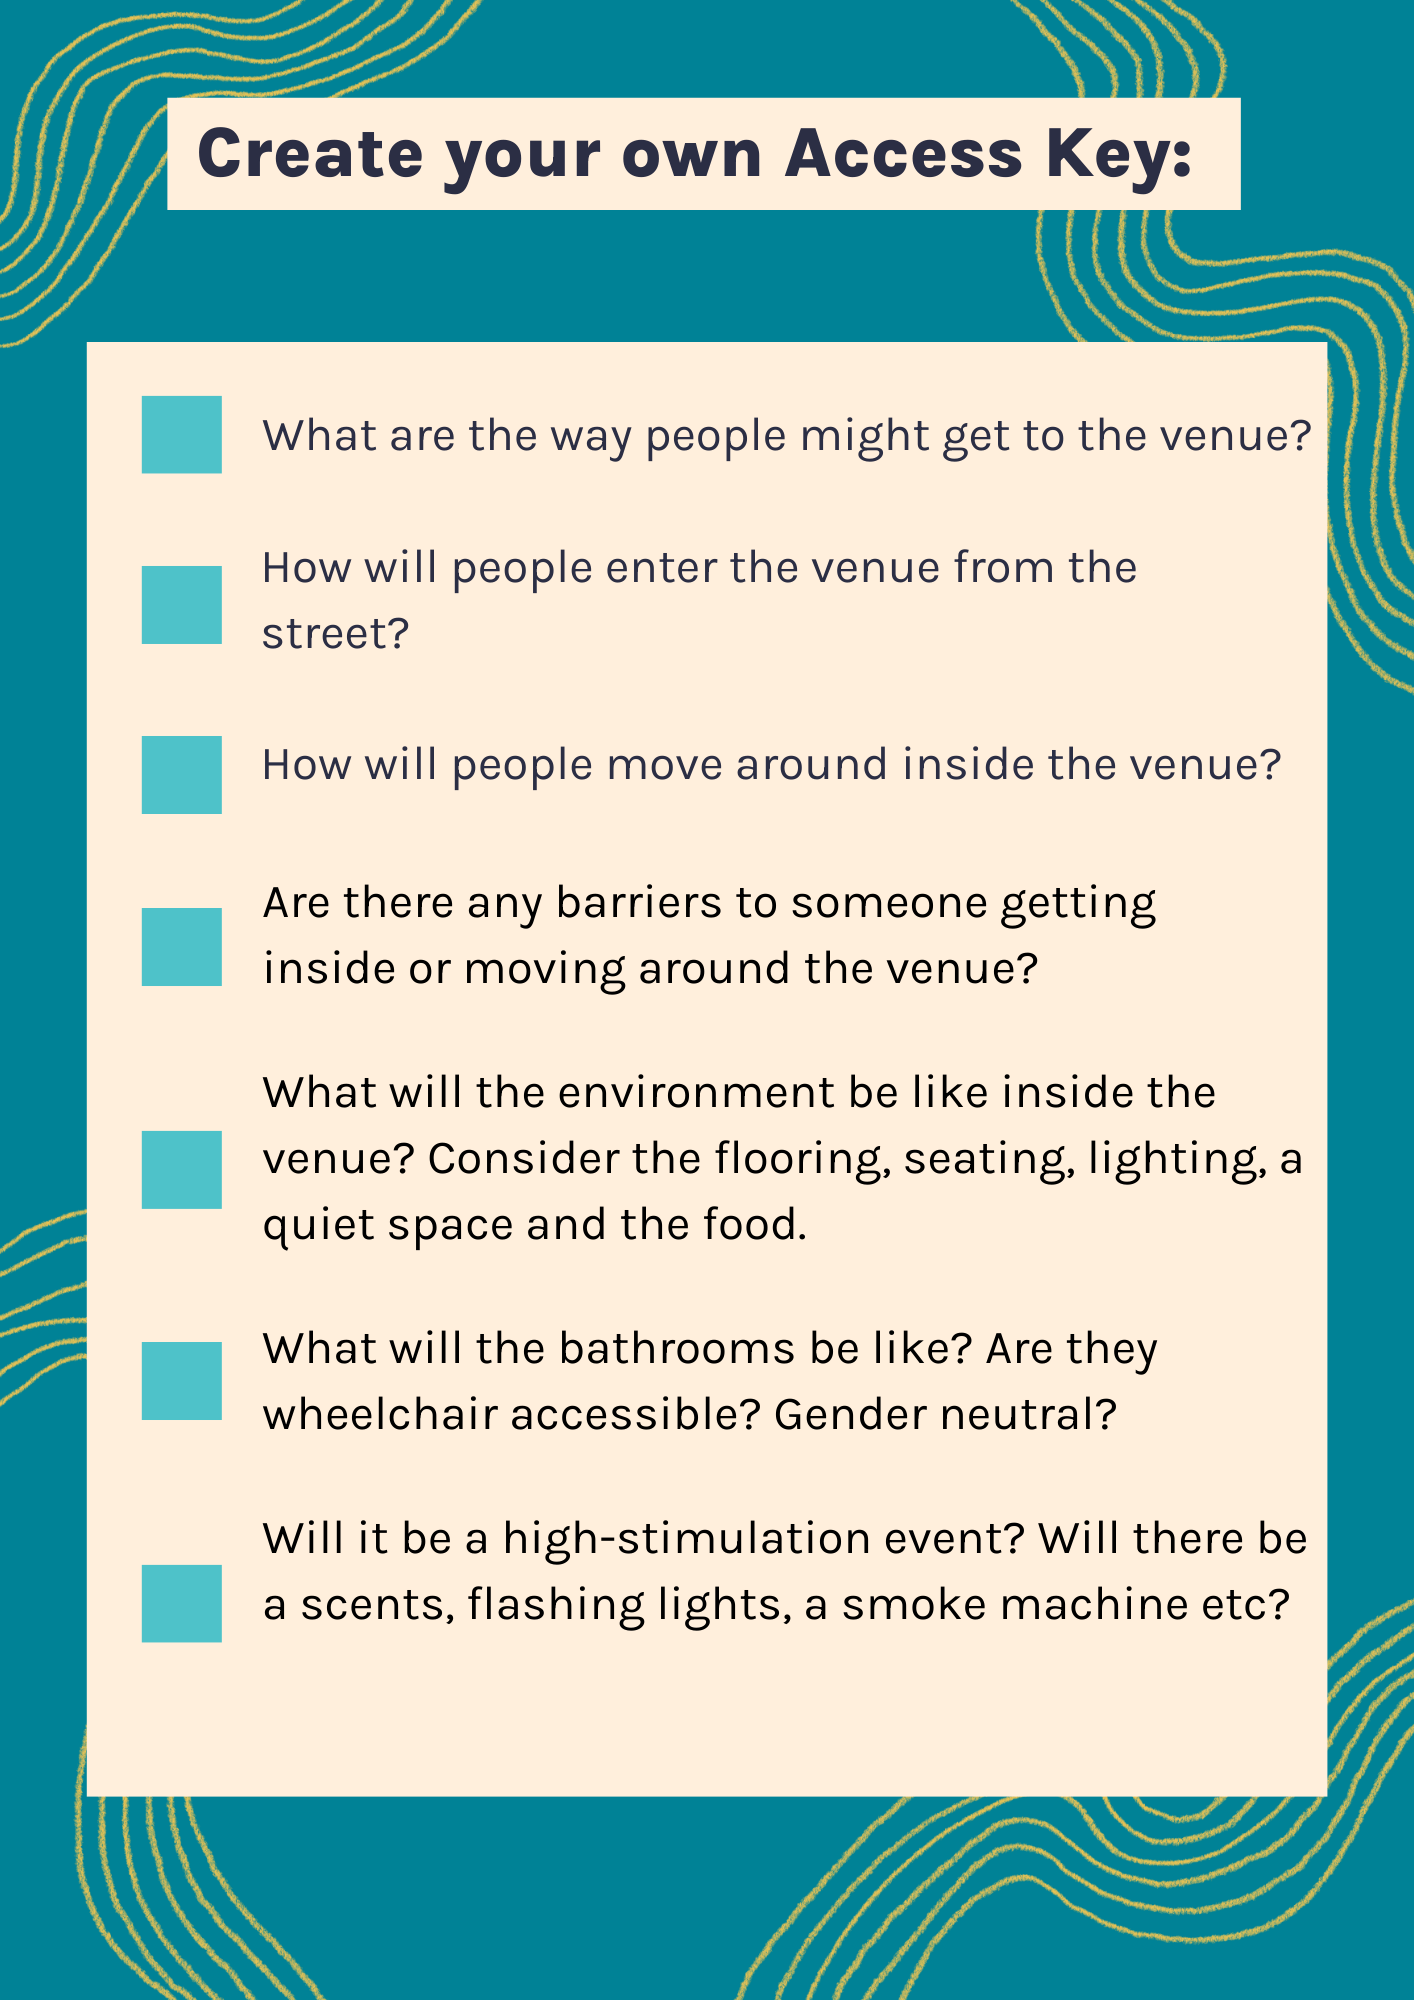
Below are some reflection questions from YDAS that you should consider when creating your own access key. These can act as a checklist of what to include, and this list is not exhaustive.
List of questions to consider when creating an access key
- It prepares people on how to get to a venue and how to navigate the venue itself.1
- They contain helpful information such as where toilets are, emergency exits, transport options.1
- Can acknowledge when a space might not be completely accessible so that young people, particularly disabled young people, have more agency and control over if and how they participate. For example, for people who use wheelchairs, or for those with other forms of mobility or sensory impairments, it can outline the best ways to get to the venue and move around them.
- They are particularly helpful for some Autistic people or people with certain types of mental illness, as it helps alleviate stress around going somewhere new.1
- They support multicultural young people to understand Australian conventions.1
- Let LGBTIQA+ young people know about gender neutral bathrooms.
- They support people with prams or people with temporary injuries to know where ramps and elevators might be.1
- Include a sensory guide, so people know what to expect from the feel, sounds, sights and smells at the venue.
- Include lots of pictures! Including pictures of surrounding landmarks and signs is really helpful.
- Ensure your images have image descriptions (a little box next to them that explain what is in the image) for people who might not be able to see them.
- Include descriptions of the width of doorways and heights of sinks in bathrooms, so wheelchair users know whether they can access the venue.
- Mention if there are any lips in the doorways and changes in floor texture for wheelchair users
- Include images or descriptions of people who work at the venue or the key youth workers on the program. You might include a description of the uniform or lanyard they wear if a photo is not appropriate.
Where to put an access key?
Once your access key is complete, there are a few ways you can share it:
If your access key is for an event, you can upload it to the event webpage or ticket purchase website.
You can also include it in an email to your event attendees prior to the event.
If your access key is for an organisation or youth space, we recommend it goes in a public place where people can easily access it if they are thinking about attending the venue. This could be somewhere like the organisation’s website or the website for the program.
- Youth Disability Advocacy Service. (n.d). Access Keys. https://www.yacvic.org.au/ydas/resources-and-training/together-2/practical-ideas/access-keys/
Related Topics
The Youth Disability Advocacy Service (YDAS) is the leading voice for disabled young people’s inclusion and are experts in championing and creating access keys. This resource uses information created and developed by YDAS.